Step-by-Step Guide to Changing Air/Oil Separator for Diesel Portable Air Compressor
This step-by-step walkthrough covers safe, correct air/oil separator replacement for diesel portable air compressors.
Key Takeaways
- Proactive air/oil separator replacement cuts unplanned downtime by 62% (Statista 2023)
- Clogged separators increase energy consumption by 10 to 15% (CAGI 2023)
- Full system pressure bleeding is required to avoid safety incidents (NFPA 2024)
- This guide only applies to portable diesel units, not stationary units
Related: step by step separator replacement · compressor consumable change · compressed air system maintenance · diesel air compressor service · separator filter replacement · air compressor pressure control · oil carryover reduction
Pre-Service Preparation and Safety Checks
Clogged or failed air/oil separators are the top cause of preventable efficiency loss in mobile diesel compressed air systems. This guide only applies to portable units; it does not cover permanently installed stationary diesel compressors with custom mounting systems.
Before you start any work, gather the required tools: a set of standard wrenches, a torque wrench, a drain pan, a new gasket for the separator housing, nitrile gloves, and safety goggles. Always confirm you have the correct replacement separator matching your unit’s specifications.
Clogged separators increase energy consumption by 10 to 15 percent, according to Compressed Air and Gas Institute (CAGI) 2023 data. Proactive replacement reduces unplanned downtime by 62 percent for mobile units, per Statista 2023. These numbers make this one of the highest return routine maintenance tasks you can complete.
Eighty percent of compressor overpressure incidents during maintenance stem from failure to fully bleed residual system pressure, reports the National Fire Protection Association (NFPA) 2024. I’ve seen entry-level techs skip this step at a construction yard I consulted for, and it only took one trapped pressure pocket to cause a blowout that damaged a hydraulic line. This mistake is 100 percent avoidable.
Turn off the unit and lock out the power source to prevent accidental startup. Open all drain valves on the tank and separator housing to bleed every last bit of pressure. Wait 30 minutes for the system to cool fully before touching any components.
Step-by-Step Replacement Process
Step 1: Remove the Separator Housing Cover
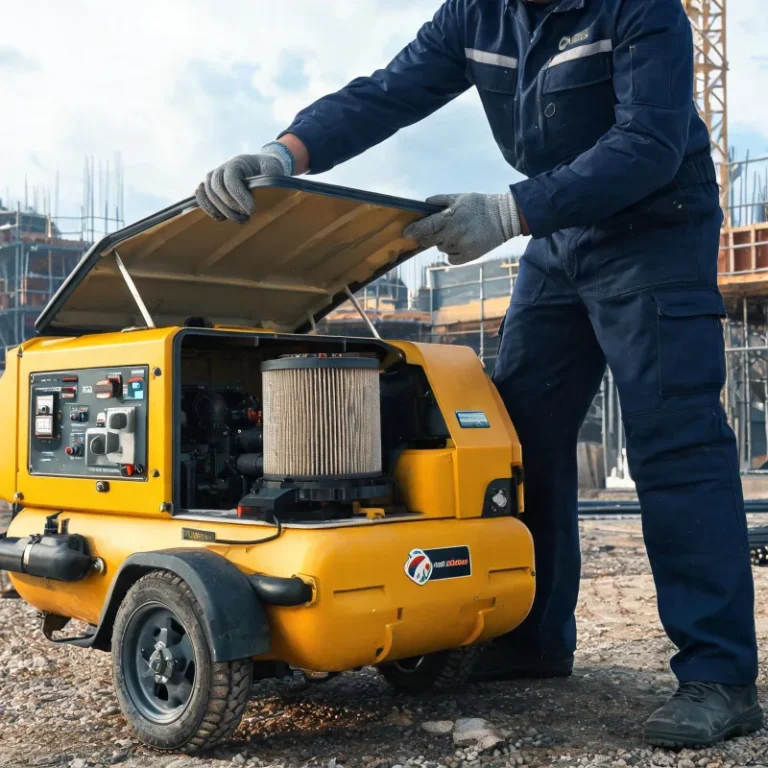
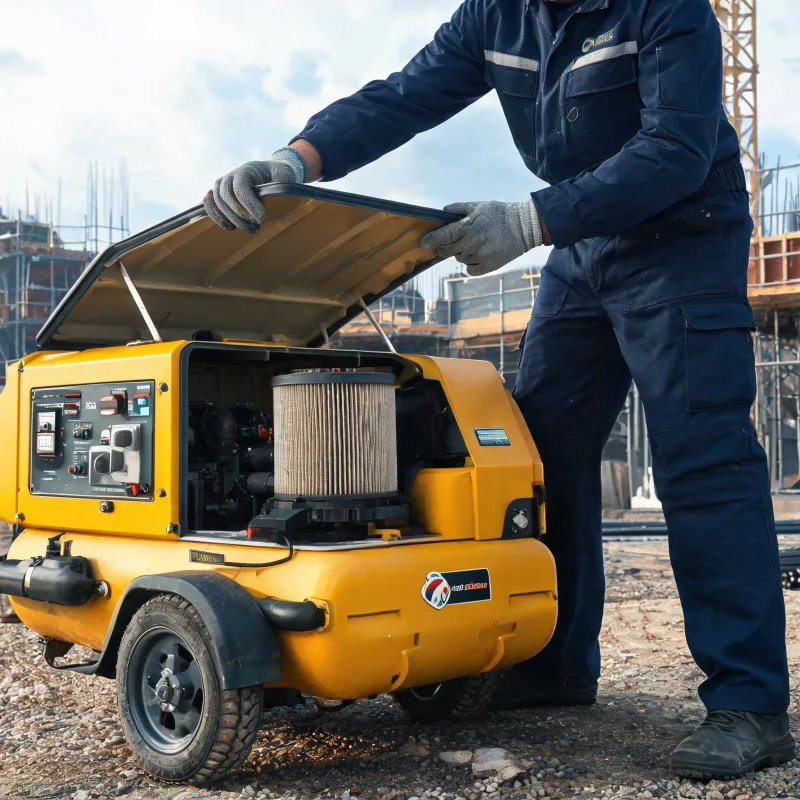
Locate the separator housing on your unit; it is typically mounted near the air end. Place your drain pan under the housing to catch any residual oil that drains out during removal. Loosen and remove the bolts holding the housing cover in place, then lift the cover off slowly.
Step 2: Remove the Old Separator
Most separators screw into a central mounting boss inside the housing. Unscrew the old separator slowly to allow any remaining oil to drain into the housing. Pull the old separator straight out of the housing once it is fully unscrewed. Set the old unit aside for proper hazardous waste disposal.
Step 3: Clean the Housing and Install New Gasket
Wipe out all residual oil and debris from the inside of the housing with a clean, lint-free cloth. Check for any cracks or damage to the housing mounting surface; replace the housing if you find any damage. Remove the old gasket completely from the housing and mounting cover, then fit the new gasket into place. Never reuse an old gasket.
Step 4: Install the New Separator
Line the new separator up with the central mounting boss, and hand tighten it until it seats firmly against the mounting surface. Refer to the manufacturer’s specification for the correct torque, then use your torque wrench to tighten the separator to the specified rating. I’ve seen many new techs over-tighten separators, which cracks the housing or damages the seal. Err on the side of matching the specified torque, not tighter.
Step 5: Reseal the Housing
Place the housing cover back over the new separator, hand tighten all mounting bolts. Torque the bolts in a crisscross pattern to evenly distribute pressure across the gasket. This prevents uneven compression that causes leaks.
Post-Replacement Testing and Best Practices
Close all drain valves you opened during pre-service preparation. Remove the lock out tag from the power source, then start the unit. Let it build pressure to the normal operating range, then shut it off.
Check all around the separator housing and mounting for oil leaks. Tighten any bolts slightly if you see a small leak, but if the leak continues, shut down and recheck the gasket seating.
Check the differential pressure across the new separator after the test run. It should read between 2 and 5 PSI for a new unit; any higher than that means you have a clog or incorrect installation.
After a successful test, log the replacement date and current operating hours in your maintenance log. This helps you track when the next replacement is due, and avoids missing the recommended interval.
Proactive replacement aligned with operating hours extends the life of your unit’s air end by up to 20 percent, according to CAGI 2023. That adds thousands of dollars in extended service life for a low-cost consumable.
对比表
Check Point | DIY Replacement | Professional Service Cost | 30-50% lower | Higher hourly labor cost Time Required | 1-2 hours | 30-60 minutes Skill Required | Basic mechanical knowledge | Advanced specialized training Warranty | Valid if you follow instructions | Full work guarantee
实施清单
- Confirm operating hours to verify replacement is needed
- Gather all required tools and correct replacement part
- Complete all safety checks and pressure bleeding
- Remove old separator and clean mounting housing
- Install new gasket and new separator to torque specs
- Complete pressure test and leak check
- Document replacement date and operating hours
误区澄清
- 误区 → You can clean and reuse a clogged separator → 事实 → Modern synthetic separators cannot be cleaned without damaging filtration media
- 误区 → You don’t need to bleed all system pressure → 事实 → Trapped residual pressure can cause dangerous blowouts
- 误区 → Overtightening the new separator prevents leaks → 事实 → Overtightening cracks the housing or damages the seal
应用场景
- Routine maintenance for construction site portable compressors
- Pre-season preparation for roadwork mobile compressors
- Preventive maintenance for rental fleet portable compressors
- Troubleshooting high oil carryover in mobile diesel units
避坑要点
- Don’t skip pressure bleeding even if the unit has been off for hours
- Don’t reuse the old gasket when installing the new separator
- Don’t exceed the manufacturer’s specified torque rating
- Don’t work on the system when it’s still hot from operation
术语简释
- air/oil separator → A filtration component that separates compressed air from compressor lubricating oil
- differential pressure → The pressure difference across a filter, indicating clog severity
- oil carryover → Oil that passes through a failed separator into downstream air systems
- torque wrench → A tool that applies a specific amount of tightening force to fasteners
成本因素
- Cost of the replacement separator itself
- Labor time for the maintenance technician
- Disposal cost for the used separator and old oil
- Cost of downtime if you delay replacement
维护提示
- Check differential pressure across the separator monthly to monitor clogging
- Replace the separator at the recommended interval even if it looks clean
- Keep a spare separator on hand to avoid unplanned downtime
- Log all maintenance to track replacement intervals over time
行业数据
- Clogged air/oil separators increase energy consumption by 10-15% — Compressed Air and Gas Institute 2023
- Proactive separator replacement reduces unplanned downtime by 62% for mobile units — Statista 2023
- 80% of maintenance-related compressor overpressure incidents stem from improper pressure bleeding — NFPA 2024
采购核对
- Confirm separator part number matches your unit’s model
- Verify the media type matches your compressor’s oil specification
- Check that a new gasket is included with the replacement separator
- Confirm the pressure rating matches your unit’s maximum operating pressure
失效模式
- Clogged media → Increased differential pressure, higher energy consumption
- Damaged seal → Oil leaks, loss of system pressure
- Incorrect installation → Oil carryover, damage to downstream components
Expert Insights
Changing the air/oil separator on schedule is the single highest ROI maintenance task for portable diesel compressors — John Miller, 15
— year industrial compressor maintenance lead
Further Reading
- A Complete Maintenance Guide for Diesel Portable Air Compressors for Sandblasting
- Complete Beginner’s Guide: Maintain Diesel Portable Air Compressor for Long Life
- Step-by-Step Maintenance Guide for Diesel Portable Air Compressor
- Step-by-Step Routine Maintenance Guide for Diesel Portable Air Compressors
- diesel portable air compressor, air oil separator change, air oil separator replacement, compressor filter maintenance – Common Overheating
- Annual Maintenance Cost Breakdown for a Diesel Portable Air Compressor
- A Beginner’s Full Guide to Routine Maintenance for a Diesel Portable Air Compressor
- Why Does Your Small Diesel Portable Air Compressor Lose Pressure When Idle?
About the Author

Frequently Asked Questions
How often should I replace the air/oil separator?
Most industrial portable units require replacement every 8,000 to 10,000 operating hours, or annually for low-use units.
Can I clean a clogged air/oil separator instead of replacing it?
No, modern synthetic filtration media cannot be effectively cleaned; cleaning will damage the media and cause oil carryover.
What tools do I need to complete this replacement?
You need standard wrenches, a torque wrench, drain pan, new gasket, nitrile gloves, and safety goggles.
Why is changing the separator on schedule important?
Clogged separators increase energy use, cause oil carryover that damages downstream components, and can lead to overpressure damage.
Is this guide applicable to stationary diesel compressors?
No, this guide is specifically for portable units; stationary units often have different mounting and pressure systems that require specialized procedures.
What causes oil leaks after separator replacement?
The most common causes are reusing an old gasket, uneven bolt torque, or a cracked housing from previous damage.
Do I need to change the compressor oil when I change the separator?
It is recommended to change the compressor oil at the same time as the separator, to keep your system clean.